Norton Shopping Guarantee Shopify Getting Started App
Register your account
- Go to the Norton Shopping Guarantee page on the Shopify App Store.
- Click the Add App button.
- Next, you will be prompted to review the various permissions the Norton Shopping Guarantee app requires. Please review the permissions, and click Install app on the bottom right side of the page.
- The Norton Shopping Guarantee dashboard will open in a new tab.
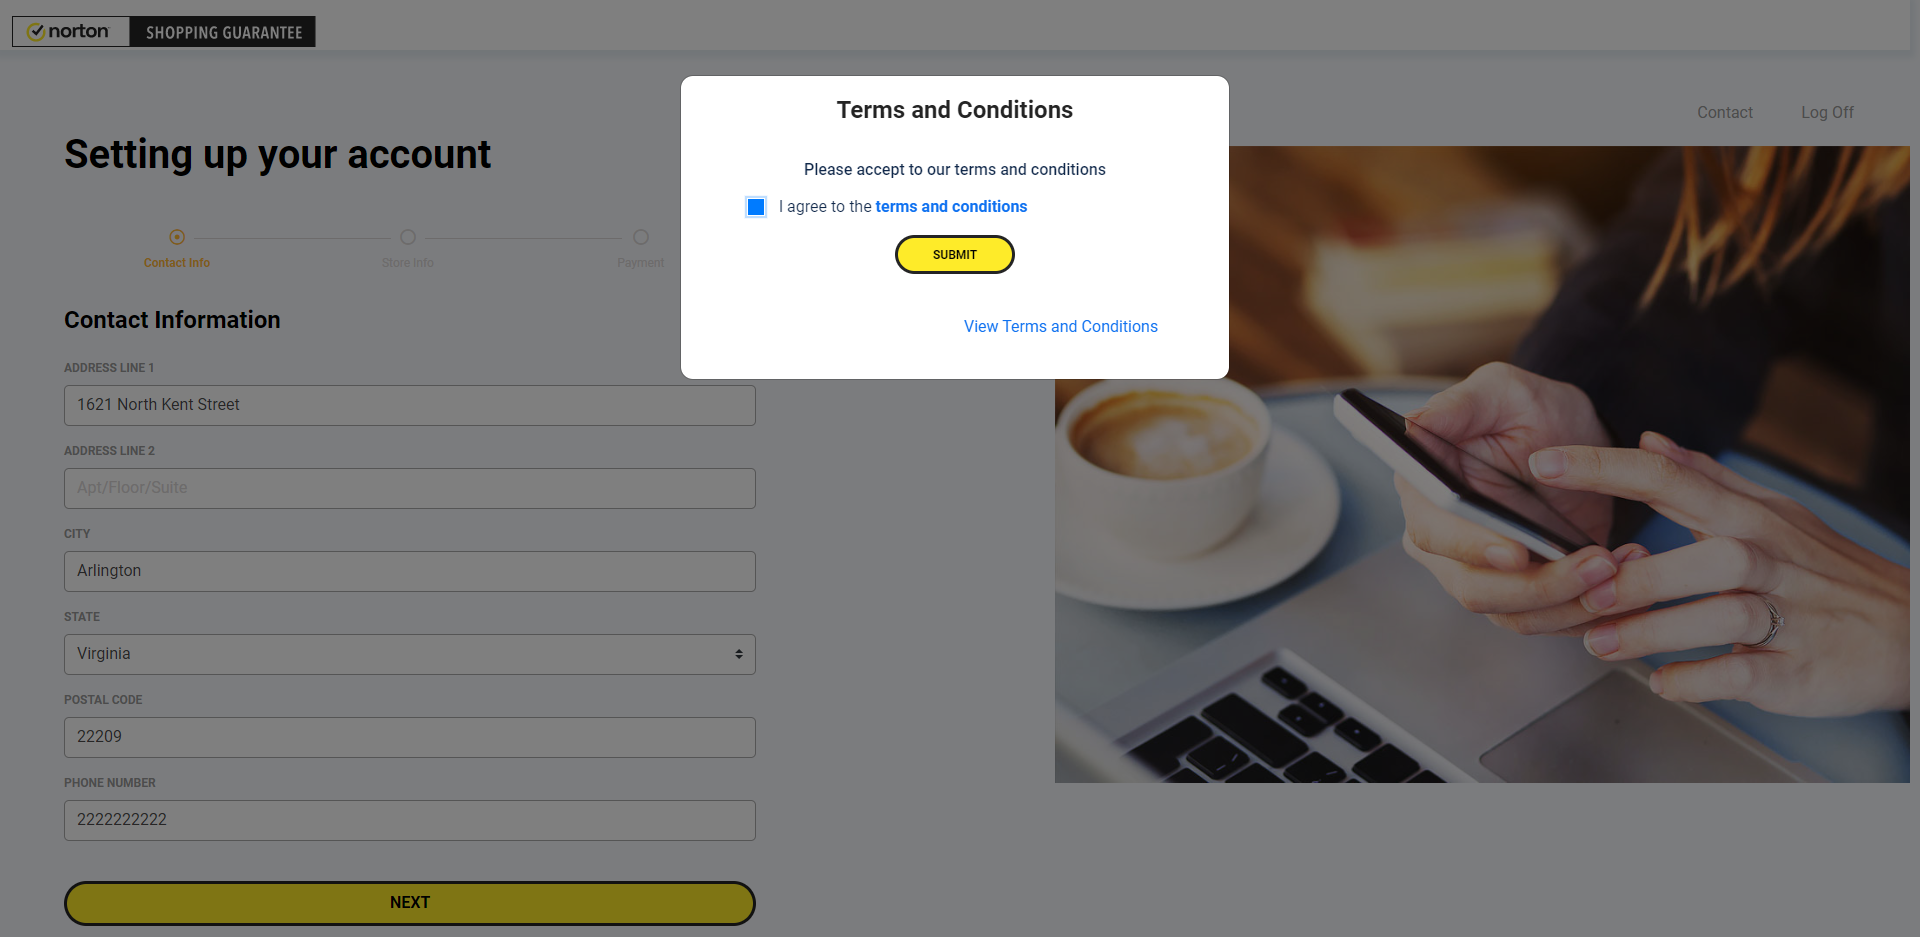
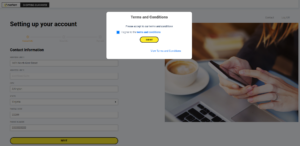
- Review the terms and conditions, and check the box to agree and click Submit. See Fig.1
- Check your email inbox to retrieve your temporary password. Choose a new password to secure your account, and click Save.
- Review and edit your business address and phone number and click Next.
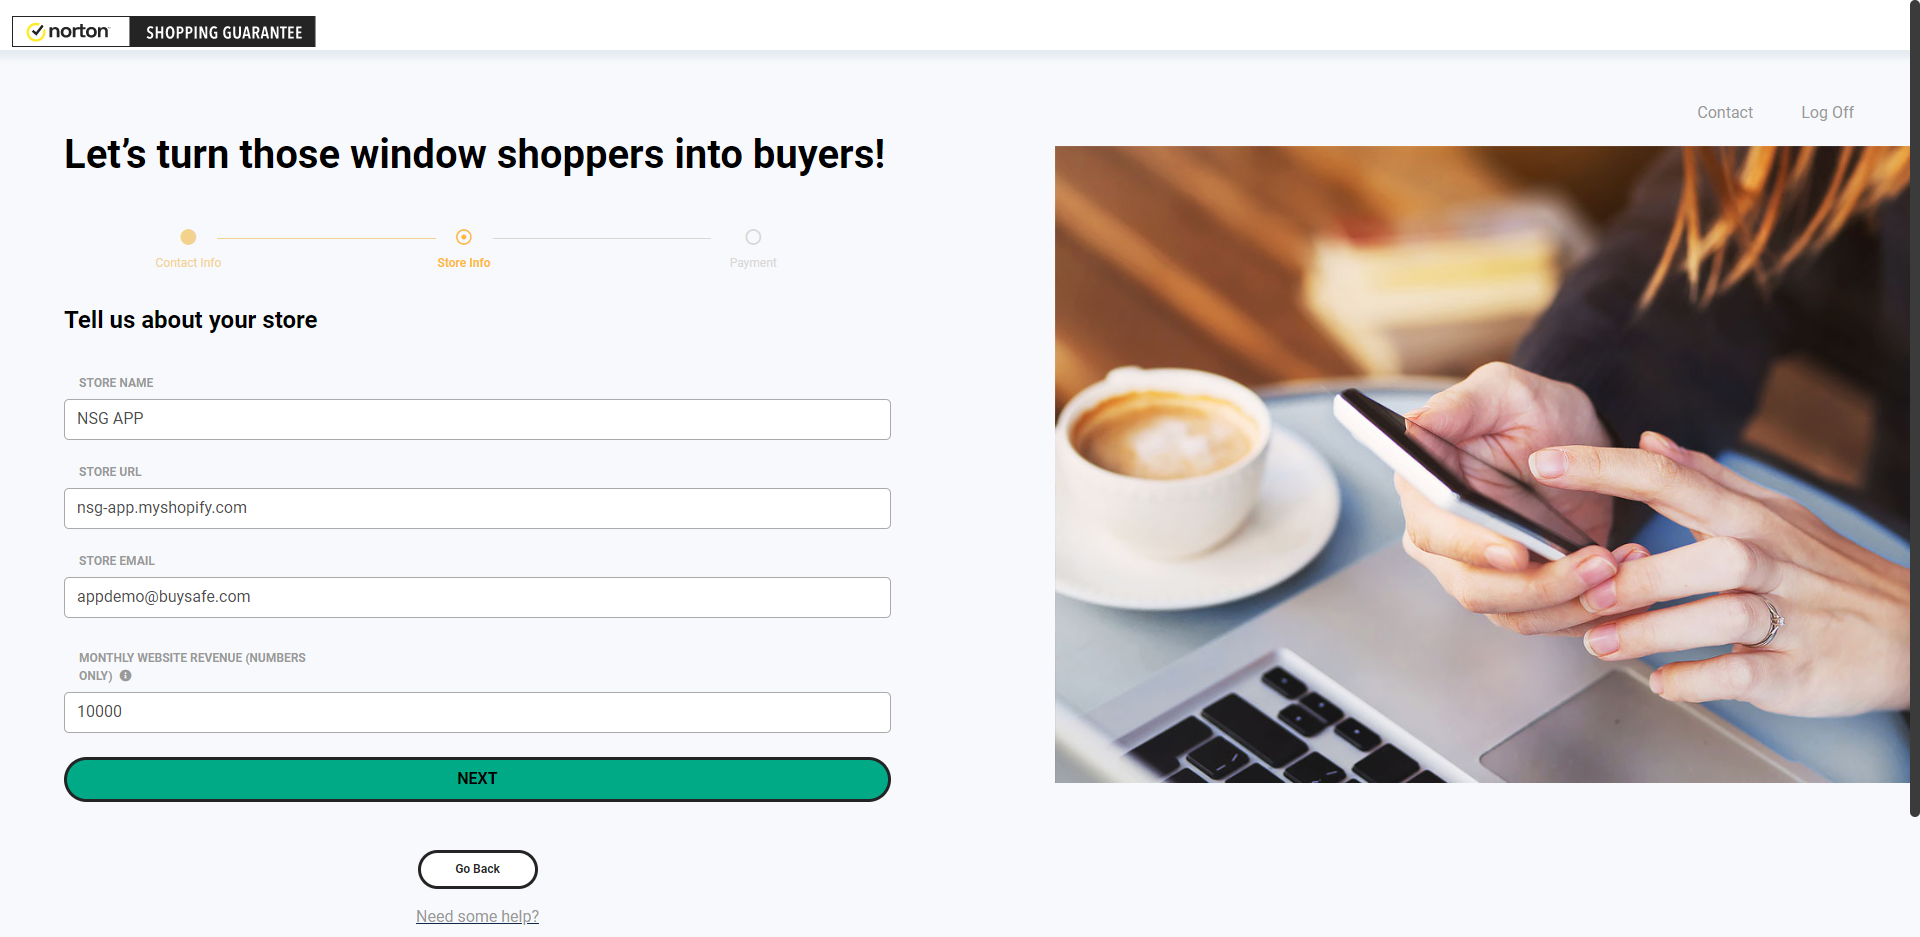
- Confirm your store name, URL, and customer support email address. We ask for an estimate of your site’s monthly sales in order to estimate your monthly shipping volume. After entering this information, click Next. See Fig. 2
- Enter your billing information.
- a. Remember: When shoppers add Norton Shopping Guarantee with Package Protection to their cart, they will pay for the coverage as part of their order.
- b. You collect the service fee from each shopper as part of the normal checkout payment process, just like any other items you have for sale.
- c. On a monthly basis, we will send you an invoice to report the fees that you have accumulated, and will charge that balance to your credit card
Welcome! Install our trustmarks into your Shopify store
- Click Let’s Get Started!
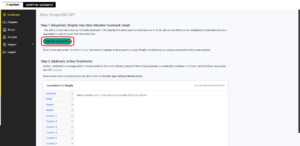
- Click the “Start the One-Click Install” button See Fig. 3. Wait for the screen to refresh.
- You’re done! Norton Shopping Guarantee with Package Protection is enabled on your store!
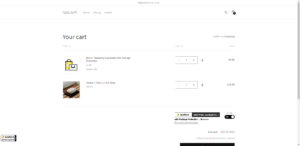
- It might take a moment or two for Norton Shopping Guarantee with Package Protection to show up. Go ahead and add an item to your cart, where you can see how shoppers will add or remove the protection as they choose. See Fig. 4
(Optional): Install action trustmarks
In addition to the site wide Norton Shopping Guarantee trustmark, you can also install action trustmarks to reinforce the value of Norton Shopping Guarantee to convert shoppers at critical points in the purchase process. We recommend placing action trustmarks on product pages near “Add to Cart” buttons and in the shopping cart near the “Submit” or “Checkout” buttons.
- In the Norton Shopping Guarantee dashboard, click on “Dashboard” in the left-hand navigation menu.
- Select the style of trustmark you want to use and copy the code.
- In your Shopify dashboard, go to the “Themes” section and select “Actions” and then “Edit code” for the theme you want to modify.
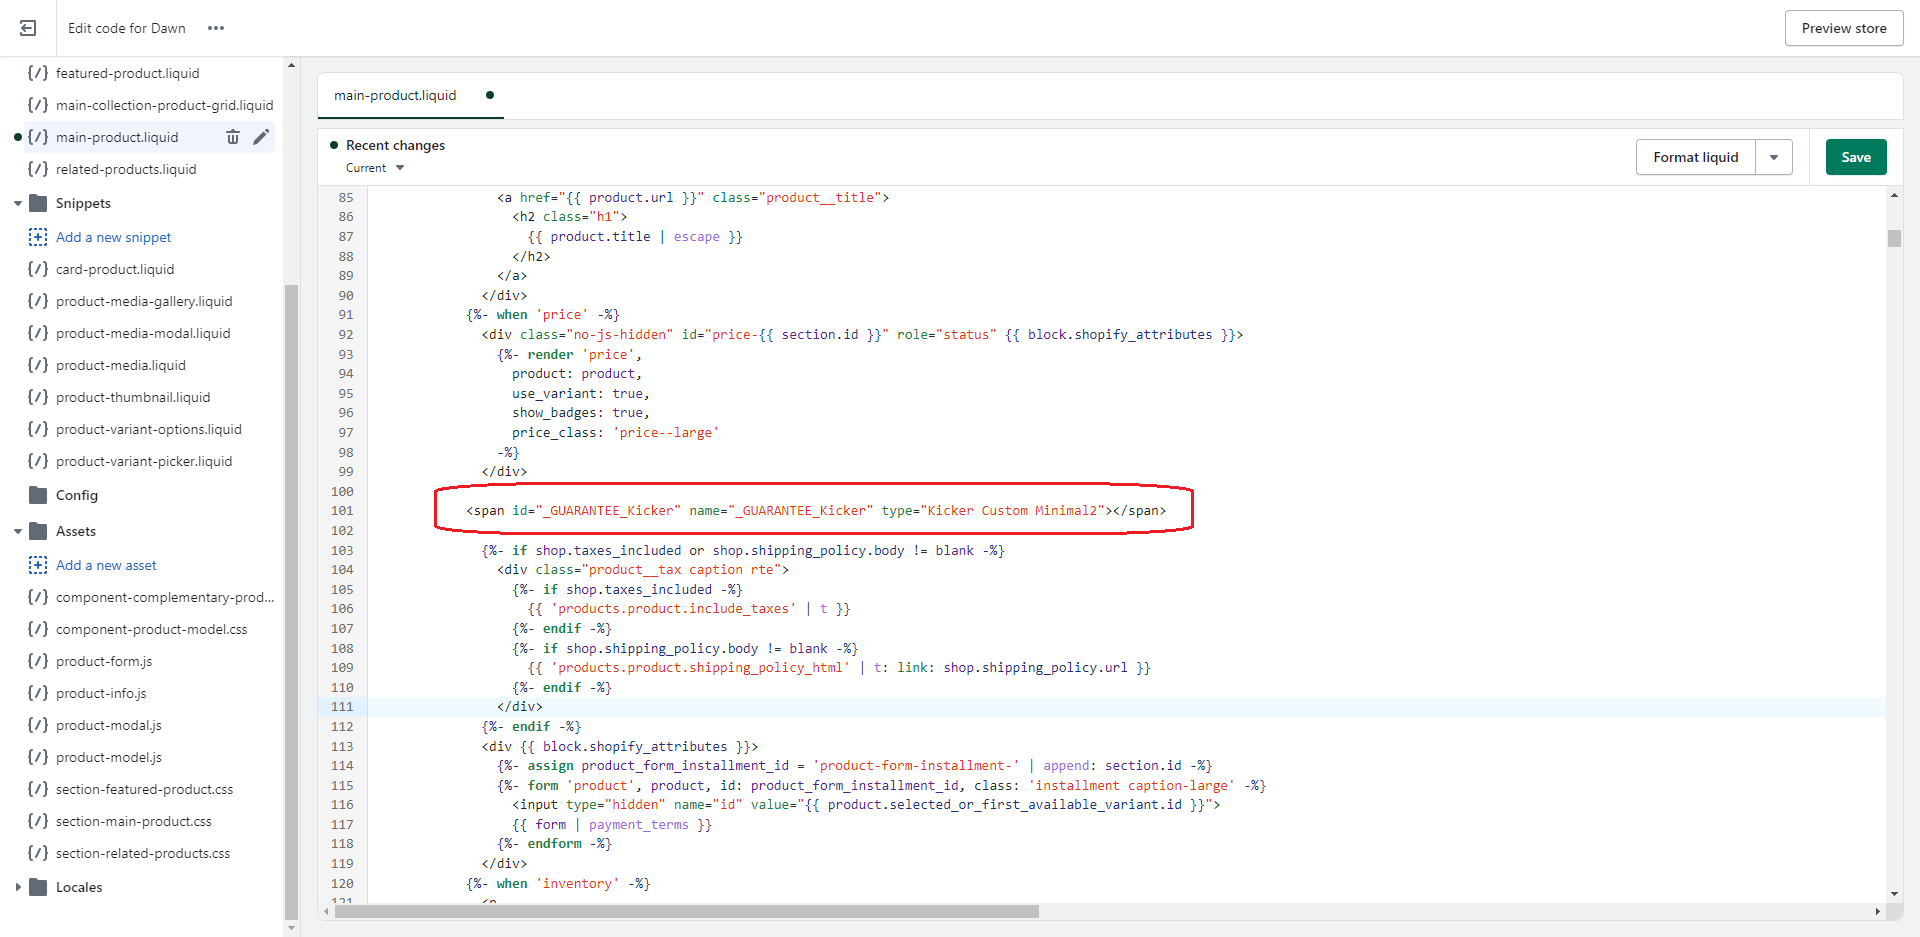
- To add a trustmark to a product page, open the “main-product.liquid” (on Dawn Theme) or ” file found in the “Sections” directory. See Fig. 5
- Look for the relevant button or section where you want to place the
trustmark (e.g., near the “Add to Cart” button), and paste the span tag
code immediately after the relevant line of code. - To add a trustmark to the shopping cart page, locate the code file for
your shopping cart page in your theme’s “Templates” directory. This file
may have a different name depending on your theme (e.g., “cart.liquid”,
“cart-template.liquid”, “cart-page.liquid”). - Paste the span tag code immediately following the closing </div> tag after the relevant section or button (e.g., “Checkout”) in the shopping cart page code. Make sure to review the code file to locate the correct closing </div> tag where the trustmark should be placed.
- Save the file.
(Optional): Complete your Business Transparency Profile
Your Norton Shopping Guarantee business transparency profile is a unique way for you to put important information about your business in front of shoppers and at key conversion points on your site. If a shopper clicks on any Norton Shopping Guarantee trustmark, your key policies, contact info, ratings & reviews and other business info are displayed alongside an explanation of our shopping guarantee service. To enable this feature, you will need to complete your business transparency profile in the Norton Shopping Guarantee dashboard.To complete your business transparency profile, follow these steps:
- In the Norton Shopping Guarantee dashboard, click on “Stores” in the left-hand navigation menu.
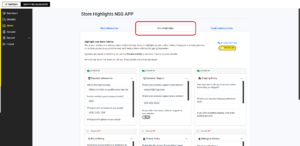
- Click on the “Store Highlights” tab. See Fig. 6
- Fill out the various sections of the profile that you would like to highlight to your customers.
- You can preview your changes by clicking the “Preview” button
Congratulations! You have now installed Norton Shopping Guarantee on your Shopify store and are ready to offer the best shopping experience to your customers with added Norton Shopping Guarantee protections.


Need more help?
If you still have questions or concerns please don't hesitate to reach out to our support team.